A common approach to debugging code is to litter it with print statements, then comment them out or delete them after you’ve solved your problem. This is sloppy and cumbersome. There’s a better way.
The Case for Logging
Logging gives you all the insights available from scattered print statements, but with more power and flexibility and nearly no extra work.
For instance, on a project I’m currently working on, I have a python script connecting to a Postgres database, scraping a website that requires a login along with a handful of other related tasks.
If something unexpected happens when scraping the site, like the script is unable to login to the website or it fails to connect to the database or maybe a database query goes off the rails – I have logging configured to notify me of these events via email.
If none of these critical events occur though, I don’t receive an email. The code just happily executes, logging benign status messages on the server. I may never look at that server log, but it’s good to know it’s there. This is the script’s version of an airplane black box recorder. Though it may never be needed, on the occasion it is, it’s very nice to have.
The critical messages sent via email and the status messages left on the server highlight a powerful logging feature – different actions taken based on the severity of an event/log message. That alone differentiates them from print statements in a big way.
That’s just the beginning though.
Let’s say I discover a problem and need to do some local development to debug it. I can flip a switch that triggers verbose log messages that will appear on the console or in a local file.
Again, compare that to the alternative of adding a bunch of print statements or possibly uncommenting existing ones to debug your code. With logging, a simple change to the configuration file and the behavior alternates between emergency-only email reporting and verbose console-based debugging.
If the potential for logging piqued your interest, read on to learn how to get started with it in python.
Basic Logging Setup
Logging is a standard module bundled with python. The most basic implementation looks like this:
import logging
logging.warning('This is a warning message')
The only difference between using logging in this example and the print statement equivalent is the use of logging.warning() vs. print().
Now, run this code in a python terminal right now and you’ll see the following output to your console.
WARNING:root:This is a warning messageThe above log message includes a few key pieces of information:
- the severity of the message,
WARNING - the name of the logger,
root - your specified message, “This is a warning message”
Forget about the logger name, you don’t need to understand that to get the basics. I’ll return to it later. Let’s dig into severity though.
Severity levels are used to differentiate and prioritize log messages so you can respond accordingly. Earlier, I outlined how I’m working on a project where a script emails critical messages to me, but logs ordinary status messages on a server – severity plays an important role in accomplishing that.
The code snippet above used logging.warning(). This command sets the severity level at WARNING for that message, but you could have also used: logging.debug(), logging. info(), logging.error() or logging. critical(). The idea behind each of these options being that throughout your code, your most verbose and rarely needed log messages are set at the lowest severity level (debug), but as the severity of the message increases, you work your way up the ladder to critical.
In order to respond to log messages of varying severities in different ways, a handler is required. Handlers are also simple to configure but hold tight on that for just a minute.
Logging Variables
You probably don’t want to just log static statements, sometimes you need to log the contents of variables. This is accomplished similarly to print statements.
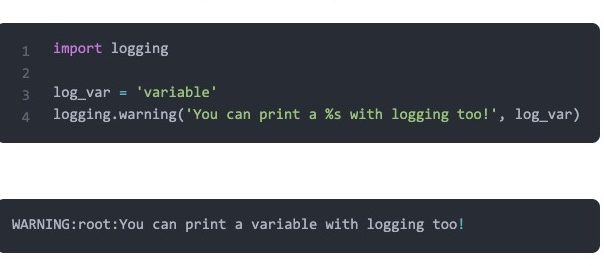
import logging

log_var = 'variable'
logging.warning('You can print a %s with logging too!', log_var)
The above code results in the following log message:
WARNING:root:You can print a variable with logging too!If you’re using Python 3.6 or higher, you can also use f-strings to display variables instead if you prefer. Here’s the python documentation on f-strings if you want to learn more about them.
Capturing exceptions
In addition to logging variables, you can also use logging to gain insight into exceptions. You’ll get the full stack trace of an exception when raised if you use logging.exception()
import logging

try:
	#Do Something
except Exception as e:
	logger.exception('Bummer, there was an exception')
Wait, this is a new command… where does this fall in the severity hierarchy? logging.exception() logs the message at level ERROR – but unlike messages logged with logging.error() it includes the additional exception data. Remember, this should only be called from within an exception handler (as done in the example).
If you’d rather log exceptions at a level other than ERROR there is a way to accomplish this, do a little googling about exc_info=True and you’ll find the solution.
This Was Logging the Simple Way
The simple approach I’ve outlined thus far is what I’ll arbitrarily refer to as the level 1 approach. Level 1 logging is almost identical to using print statements. The only difference is you have to import the logging library and pick which severity you want to use for each message.
If we add just a little more complexity and jump up to what I’ll refer to as level 2 logging, we get all sorts of additional features, like the ability to send log messages to a file instead of the console as done in the code below.
import logging
logging.basicConfig(filename='test.log', level=logging.DEBUG)
Now, if you type the same log command from before:
logging.warning('This is a warning message')
Instead of being displayed in the console, it’s pushed into the file test.log.
To get these level 2 features, the only additional complexity required was a call to basicConfig(). Let’s take a closer look at the parameters used in the call above.
First filename='test.log' specifies that all log messages should be routed to the file test.log. Second, level=logging.DEBUG sets the minimum severity message this logger responds to.
By default logging only captures messages at a severity level of WARNING and higher, i.e., WARNING, ERROR & CRITICAL. All other messages are dropped. So, in the level 1 logging example, if you had used logging.debug() instead of logging.warning() no message would have appeared in your console. Try it if you don’t believe me :).
In the level 2 example above using basicConfig(), the minimum level is now set to DEBUG with the level property, and since DEBUG is the lowest level log message, all levels will be captured in the test.log file, i.e., DEBUG, INFO, WARNING, ERROR & CRITICAL.
basicConfig() can be used to configure other logging properties too, like whether or not the log file should be appended to (default behavior) or overwritten (filemode=‘w’) each time you run your program. You can also adjust the format of the log messages.
Unfortunately, you can’t configure a custom logger using basicConfig(), you only have access to the root logger. So, even with level 2 logging, you still miss out on a lot of power and versatility. To get access to those features requires just a bit more complexity and jumping up to level 3. However, if you have simple needs and want to stick with basicConfig() you can learn more about the configuration options here.
Our First Trip Into The Weeds
One other point worth mentioning is that basicConfig() is meant to be called before any other logging commands. If you call it after a call to logging.debug() or an earlier call to basicConfig(), it will be ignored. So, if you’re experiencing unexpected behavior from basicConfig(), that’s something to investigate.
Ok, back out of the weeds…
Wrapping Up The Basics
If you implement logging as outlined thus far, you’re already miles ahead of using simple print statements. But, there is a lot more power and flexibility available that only requires a little extra complexity.
Loggers, Handlers & Formatters
Loggers
The logging module provides a default logger. That’s what we’ve relied on thus far. It’s fine for simple cases too, but as your codebase grows, you may want to name your loggers so you can take advantage of the logger hierarchy. Remember root from earlier? That’s the name of the default logger.
Usually you’ll want to define your custom logger as such:
import logging
logger = logging.getLogger(__name__)
Using python’s built-in __name__ yields log messages that track your package/module hierarchy and thus clearly indicate the source of logged events. Meaning, if this code is executing within some module like, example.project.module – that’s what will be reported in the logger output (as opposed to root). This can be a big help in multi-module, complex code.
Another Quick Trip in the Weeds
Within multi-module code, where you use getLogger() within each module, there is a pitfall you need to be careful not to get tripped up on. By default, python respects existing loggers.
Let’s say you had the following code in example_module.py:
#example_module.py
import logging

#logger instantiated by default
logger = logging.getLogger(__name__)

def test():
	logger.info('Hello world')
Now in your top-level code, let’s say you do something like this:
#top_level_example_module.py
import logging
from example_module import *

logger = logging.getLogger(__name__)
This configuration may lead to unexpected behavior. Since the import of example_module occurs before the logger is called in your top-level code, the settings from the example_module.py logger take precedence. _
To prevent this, only get the logger when it’s needed, not by default within a module. An updated example_module.py with that in mind looks like this:
#better_example_module.py
import logging

def test():
	#logger only instantiated when needed
	logger = logging.getLogger(__name__)
	logger.info('Hello world')
Here getLogger() is within the function not outside of it as in the first version provided.
To make sure there are no preexisting loggers mucking things up when you load your logger, you can also set the parameter disable_existing_loggers to false. I’ll show you how to do this with configuration files soon.
I know some of that may have been confusing. Just keep it in the back of your mind, it’s one of those things to examine more closely if/when your logger isn’t behaving as expected.
Handlers
Handlers define where your program should send log messages. One of the most powerful features with handlers is that you can define more than one. Earlier I mentioned how I was sending critical messages to myself via email, reporting regular status to a file on a server and had an option for detailed logging to the console when debugging locally. This is a prime example of handlers in action.
#multiple_handler_example.py
import logging

logger = logging.getLogger(__name__)

# Instantiate Loggers
handler1 = logging.StreamHandler()
handler2 = logging.FileHandler('test.log')

# Set Severity Handler Responds To
handler1.setLevel(logging.DEBUG)
handler2.setLevel(logging.ERROR)

# Add Handlers to Logger
logger.addHandler(handler1)
logger.addHandler(handler2)
Keep in mind that setting the severity establishes the lowest level that the handler will respond to. So, in the example above handler1 will respond to DEBUG, WARNING, ERROR, and CRITICAL while handler2 will respond to ERROR and CRITICAL, ignoring DEBUG and WARNING.
You can use handlers to log messages to many different destinations like files, HTTP GET/POST locations, emails, sockets, queues, etc. For more on that, check out this list of useful handlers.
Formatters
By default, a log message looks something like this:
WARNING:root:This is a warning messageThis may satisfy your needs, but it is pretty basic. There’s a handful of additional information available such as date/time, process id, etc. that you may want to include depending on your application. Formatters provide a mechanism for including these extra details and/or generally modifying the way your log messages appear.
#explicit_logger_handler_formatter_example.py
import logging

logger    = logging.getLogger(__name__)
handler   = logging.StreamHandler()
formatter = logging.Formatter('%(asctime)s - %(name)s - %(levelname)s - %(message)s')

handler.setFormatter(formatter)
logger.addHandler(handler)
logger.warning('This is a formatted message')
Running the code above produces the output depicted below.
2019-10-11 07:57:07,637 - __main__ - WARNING - This is a formatted messageYou’ll notice that the date and time are now present in the message.
Just like with handlers, you can specify multiple formatters. This can be helpful if you want more detail to be displayed for debugging, but fewer details for regular info messages. There’s a lot you can do with formatters, here’s the python documentation on formatters for you to explore.
Configuration Files
It’s good practice to load your logger configuration from a separate file. It enables you to modify the behavior without changing your code, e.g., the example up top where I mentioned different configurations running on a production server and when developing locally.
There are a couple of log file formats you can use, but my personal preference is YAML, so I’ll show that.
One Final Trip Into the Weeds
YAML does require the PyYAML library. If you don’t have that library, you can get it via pip with the following command:
pip install pyyamlYou may need to run the command as root using sudo. Ok, back to log files…
Here’s an example YAML log configuration file
#config.yaml
version: 1
formatters:
  simple:
    format: '%(asctime)s - %(name)s - %(levelname)s - %(message)s'
handlers:
  console:
    class: logging.StreamHandler
    level: DEBUG
    formatter: simple
    stream: ext://sys.stdout
loggers:
  example_module:
    level: DEBUG
    handlers: [console, email]
    propagate: no
  email:
    class: logging.handlers.SMTPHandler
    level: ERROR
    mailhost: <your mail server>
    fromaddr: <email from address>
    toaddrs: <email to address>
    subject: <your subject line>
    credentials: !!python/tuple [<login>, <password>]
root:
  level: DEBUG
  handlers: [console]
#loading_logfile_example.py
import logging
import logging.config
import yaml
with open('config.yaml', 'r') as f:
config = yaml.safe_load(f.read())
logging.config.dictConfig(config)
logger = logging.getLogger(__name__)
logger.debug('This is a debug message')If you do use the name variable for all of your loggers and you want to specify unique properties for a handler of a specific module, you’ll need to make sure to use the name of that module in your log file. You can see I did this with example_module.py in the configuration file above.
Odds and Ends
If you don’t specify a name for a logger, it defaults to root and if you do specify a name, but don’t specify a unique behavior, it will default to the behavior of the root logger.
Multiple calls to getLogger() with the same name will return a reference to the same logger object – this is helpful so you don’t have to pass logger objects around everywhere in your code, you can just call getLogger() whenever you need to use it.
WRAP UP
I definitely didn’t cover everything there is to know about logging in this post, but I did try to provide links for areas you might want to explore more deeply. Hopefully, this post has given you the motivation to start using logging and tools you need to implement it.
I maintain a GitHub repository for this site. The examples in this post are pretty basic, but they’re in the repository along with code related to other posts on this site.
If anything I’ve written here is unclear, feel free to post questions in the comments below.
Resources
GitHub repository with code from the examples in this post (and from the rest of this site).
The python organization has published a Logging Cookbook, that provides code snippets for common use cases.
Finally, this article was made possible in part by these other great pages on logging in python: